
A rider who feels centered may still sit more heavily to one side. A hand that seems quiet may move backward with every rise of the trot. These habits can be difficult to feel because they have become familiar.
Rider biomechanics looks at how your body moves and how that movement interacts with your horse. Understanding it can help you give clearer aids and recognize when your own balance may be contributing to a training difficulty.
Why rider biomechanics matters
Your horse carries your weight while responding to your aids. Where you place that weight, and how well you follow the movement beneath you, changes the physical demands of the work.
In a study of 80 horse and rider pairs, researchers found associations between rider asymmetry and uneven forces beneath the saddle. Collapsing through one hip and leaning the upper body sideways were associated with different loading patterns. The horse’s own movement also contributed. These findings support looking at horse and rider together rather than assuming that every uneven pressure pattern comes from the saddle. [1]
For training, that means your position deserves attention alongside the exercise you are asking your horse to perform. A rider who tips forward during a downward transition may find it harder to deliver a clear, consistent aid. A rider who loses balance on a circle may use the reins or legs for support without intending to.
The goal is a seat that can adapt to movement while allowing the hands and legs to act independently. Holding yourself rigidly in a position that looks correct can interfere with that adaptability.
How your movement affects your horse
Rider influence has both a mechanical component and a communication component. Weight and movement affect the forces the horse carries. Rein, leg, and seat aids also carry learned meaning.
Consider a leg that grips whenever you lose balance. From the saddle, it may feel like an effort to stay secure. For the horse, that pressure can be difficult to distinguish from an intentional aid. Similarly, hands that move with the rider’s torso can make rein contact inconsistent.
Research with 20 experienced riders found that better control of pelvic movement on a gymnastic ball was associated with higher scores for riding quality and harmony. It was an association, rather than proof that ball exercises improve riding, but it highlights the relevance of controlled movement. [2]
A persistent difficulty on one rein is a reason to investigate the whole partnership. Rider habits may contribute, but so can the horse’s physical limitations, discomfort, or saddle fit. New unevenness, repeated stumbling, or signs of pain warrant veterinary attention.
Recognizing a neutral position
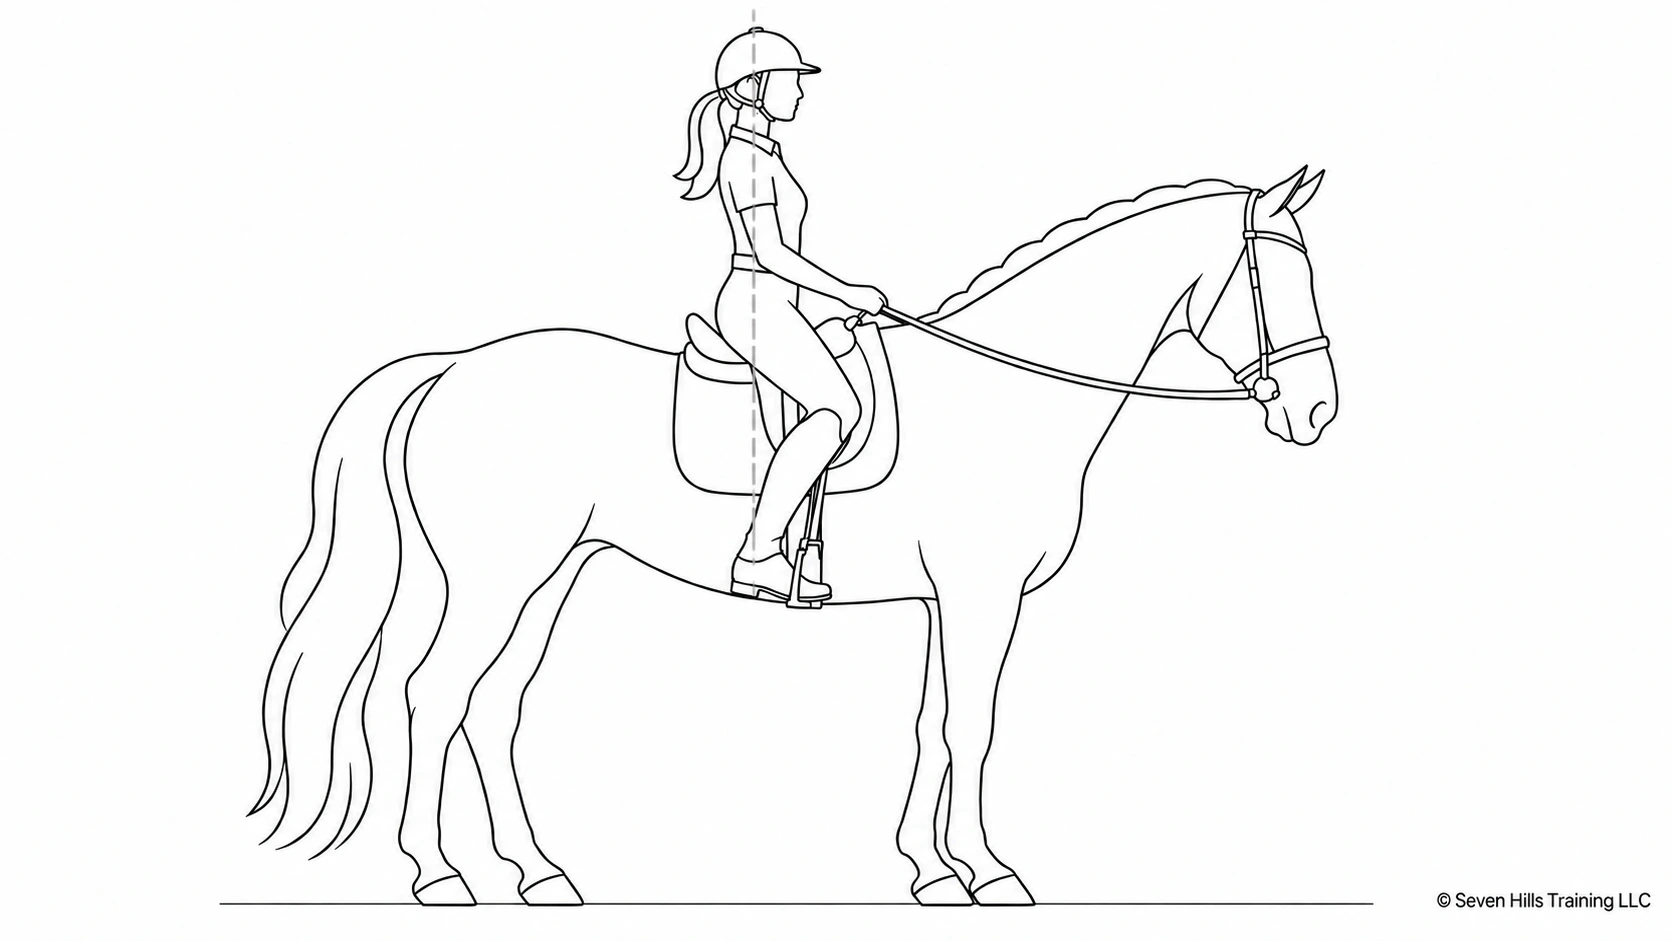
For an upright seated position, ear–shoulder–hip–heel is a useful visual reference. Viewed directly from the side, imagine a vertical line through the middle of the outer ear, the shoulder joint, the hip joint, and the outside ankle bone. The familiar word “heel” is shorthand here: the reference point is the ankle, rather than the back of the boot.
Imagine the horse disappearing from beneath the rider. Would the rider land balanced over their feet, or would they need to step to keep from falling? This is a useful observation tool, rather than a test of a single perfect silhouette. Look from both sides, since rotation or unevenness may be more apparent from one direction.
A neutral torso has the rib cage balanced over the pelvis, with the breastbone approximately vertical above the pubic bone. Let the spine retain its natural curves. Lifting the chest too far and arching the lower back can disturb that relationship, as can rounding the back and collapsing through the front of the body. Thinking of the front and back of your torso as equally long can help you explore a more balanced position without forcing either shape.
When the alignment applies
This reference is most useful at halt and when seated in walk, sitting trot, or canter. Movement creates small changes throughout each stride, so use it to understand your overall balance rather than trying to hold every point on a fixed line. Rising trot and jumping involve different positions and should not be judged against the same upright seated alignment.
Why a correction can feel unfamiliar
Everyday posture gives you useful clues about your riding habits. Notice whether you stand with your hips ahead of your feet, sit with your chest lifted and lower back arched, or regularly lean to one side. Compare those observations with side-view riding footage and your instructor’s feedback.
If your lower leg habitually sits ahead of your hip, bringing it underneath you can initially feel much farther back than it looks. A more neutral torso may also feel unfamiliar. Make small changes with your instructor, then use video to compare the sensation with the visible result. Aim for a position you can move and breathe in comfortably.
Self checks out of the saddle
Use these observations to identify patterns to discuss with your instructor. They are not diagnostic tests, and small differences between sides are common.
Notice your standing habits. Stand comfortably with both feet on the floor. Observe whether you habitually rest on one leg, lock a knee, or turn your trunk. A mirror or a short recording can help you compare what you feel with what you see.
Compare supported balance. Stand beside a counter or sturdy chair. With support available, lift one foot slightly and balance for five to ten seconds. Compare sides. Notice whether you lean your trunk, drop a hip, or hold your breath. Keep your eyes open.
Watch yourself stand from a chair. Use a stable chair with your feet comfortably apart. Stand and sit slowly, using your hands if needed. Notice whether you repeatedly shift toward one side or turn as you rise.
Check comfortable rotation. Sit on a firm chair with your feet supported. Turn your chest gently each way while keeping your pelvis facing forward. Observe differences without forcing the range.
Record what you notice in plain language: “I shift right when I stand,” or “Turning left feels more restricted.” That is more useful than deciding that a particular muscle must be weak or tight.
Self checks in the saddle
Begin on a suitable horse in a familiar arena. Keep your normal safety equipment and work within your current ability.
At halt: Notice contact through each seat bone, the pressure under each foot, and whether your shoulders feel turned. Ask your instructor to compare your perception with what they see. Check stirrup leather lengths and saddle position before trying to correct yourself. Matching stirrup holes do not guarantee matching lengths.
At walk: Follow the movement without deliberately driving with your seat. Notice whether one hip feels less able to move, one knee grips, or one hand travels more than the other.
On both reins: Ride the same simple pattern in each direction. Compare your balance and your horse’s response. Does one leg creep forward? Does your trunk lean on a circle? Look for repeated tendencies across several strides.
Through transitions: Ask someone to film a few familiar transitions. Watch whether you tip, brace, or change your hand position just before the horse changes gait. Review the sequence at normal speed as well as in slow motion.
Change one thing at a time with your instructor, then repeat the exercise. Note whether the change feels sustainable and whether your horse’s response becomes more consistent. Avoid shortening one stirrup or forcing more weight into a seat bone simply to make yourself look level.
Exercises that may help
Choose exercises around the patterns you have identified. General strength and balance work can provide a useful foundation, while individual limitations may need a more specific plan.
A small study of ten dressage horse and rider pairs found that left-to-right saddle pressure differences decreased after the riders completed an eight-week unmounted core fitness program. The result is encouraging, but it does not establish that every rider needs the same routine or that exercise alone prevents equine injury. [3]
These gentle exercises offer a starting point:
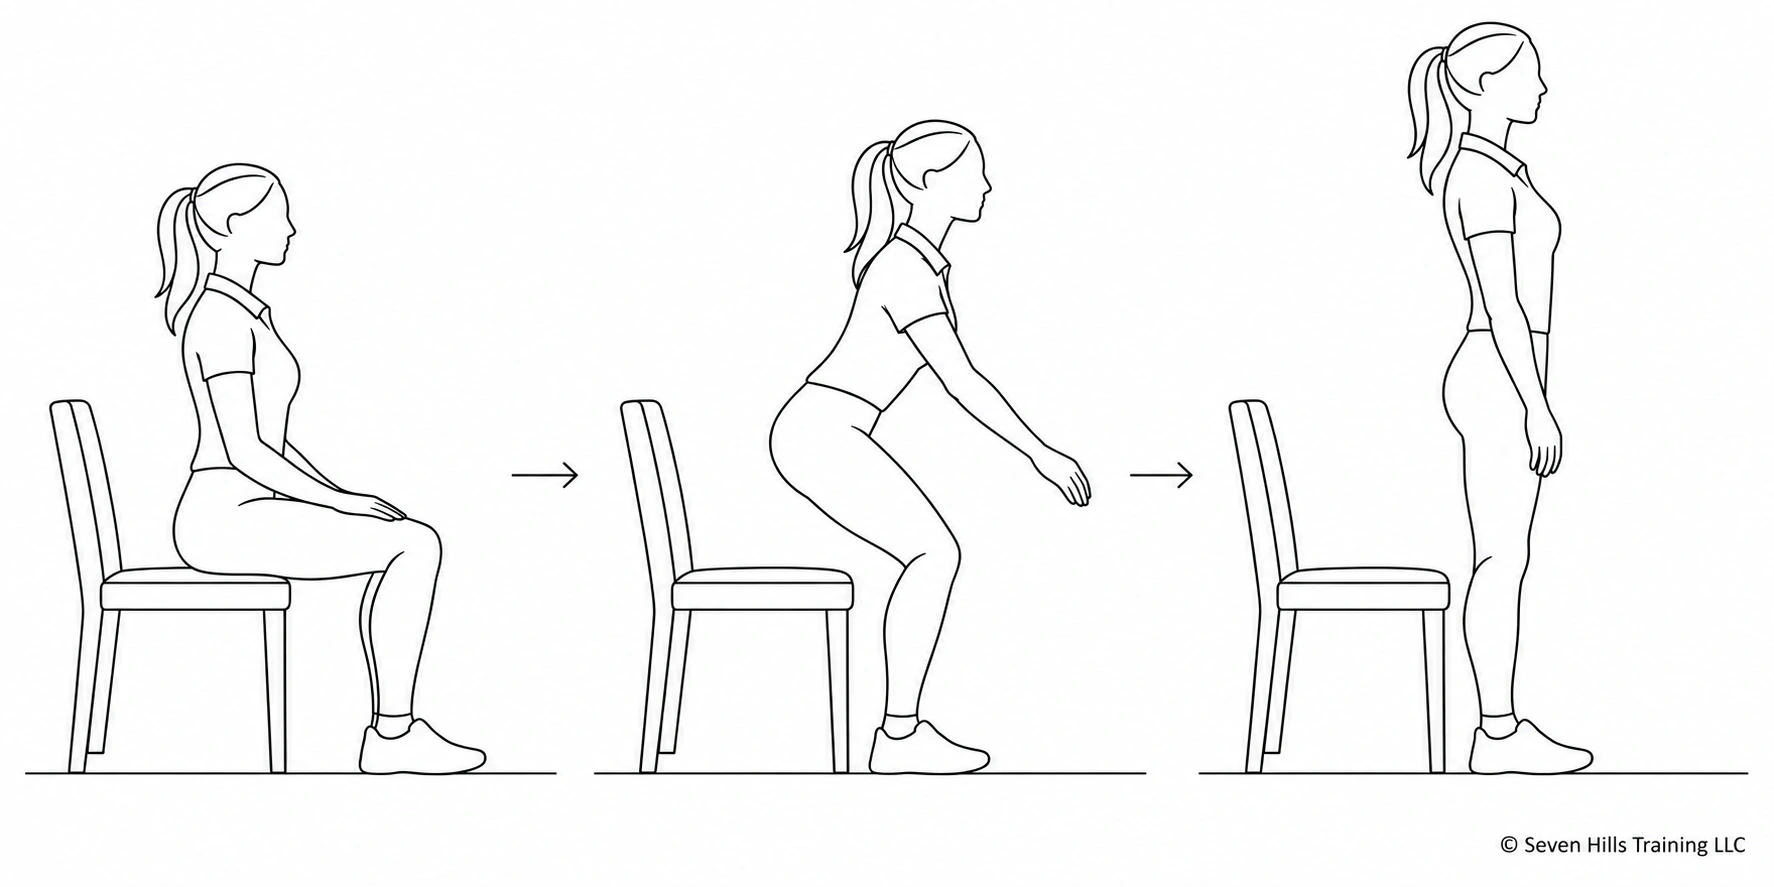
Slow chair stands
Stand from a stable chair and lower yourself with control. Start with five comfortable repetitions. Watch for a repeated sideways shift.
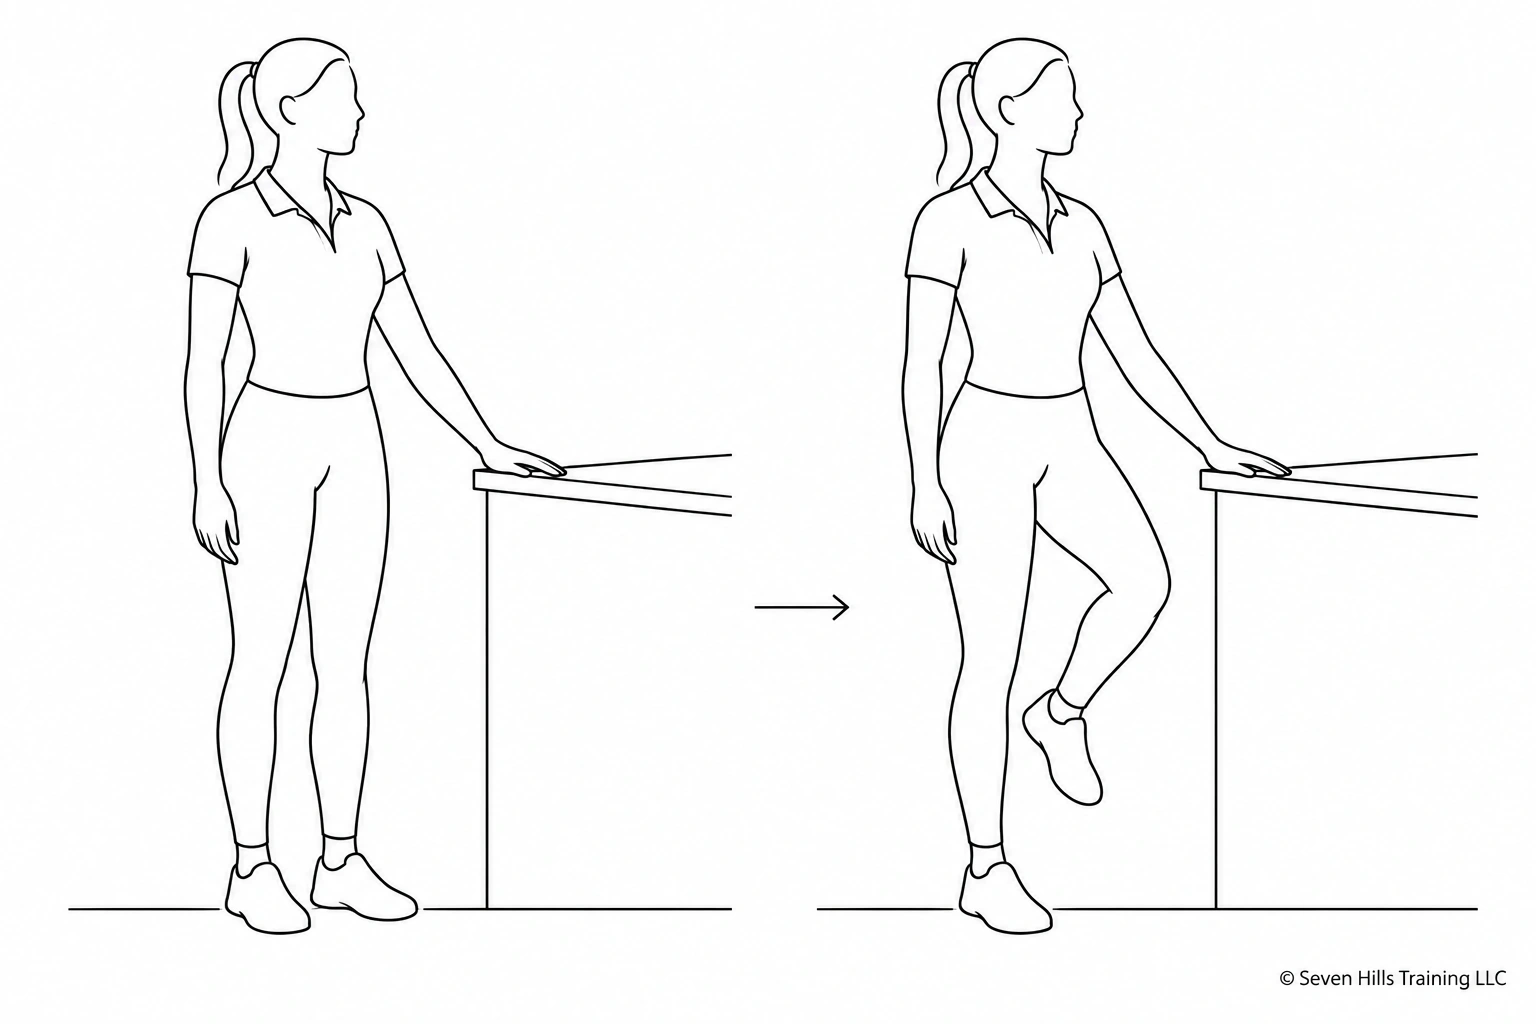
Supported single-leg balance
With fingertips on a counter, balance for five to ten seconds. Repeat up to three times per side, maintaining a soft supporting knee.
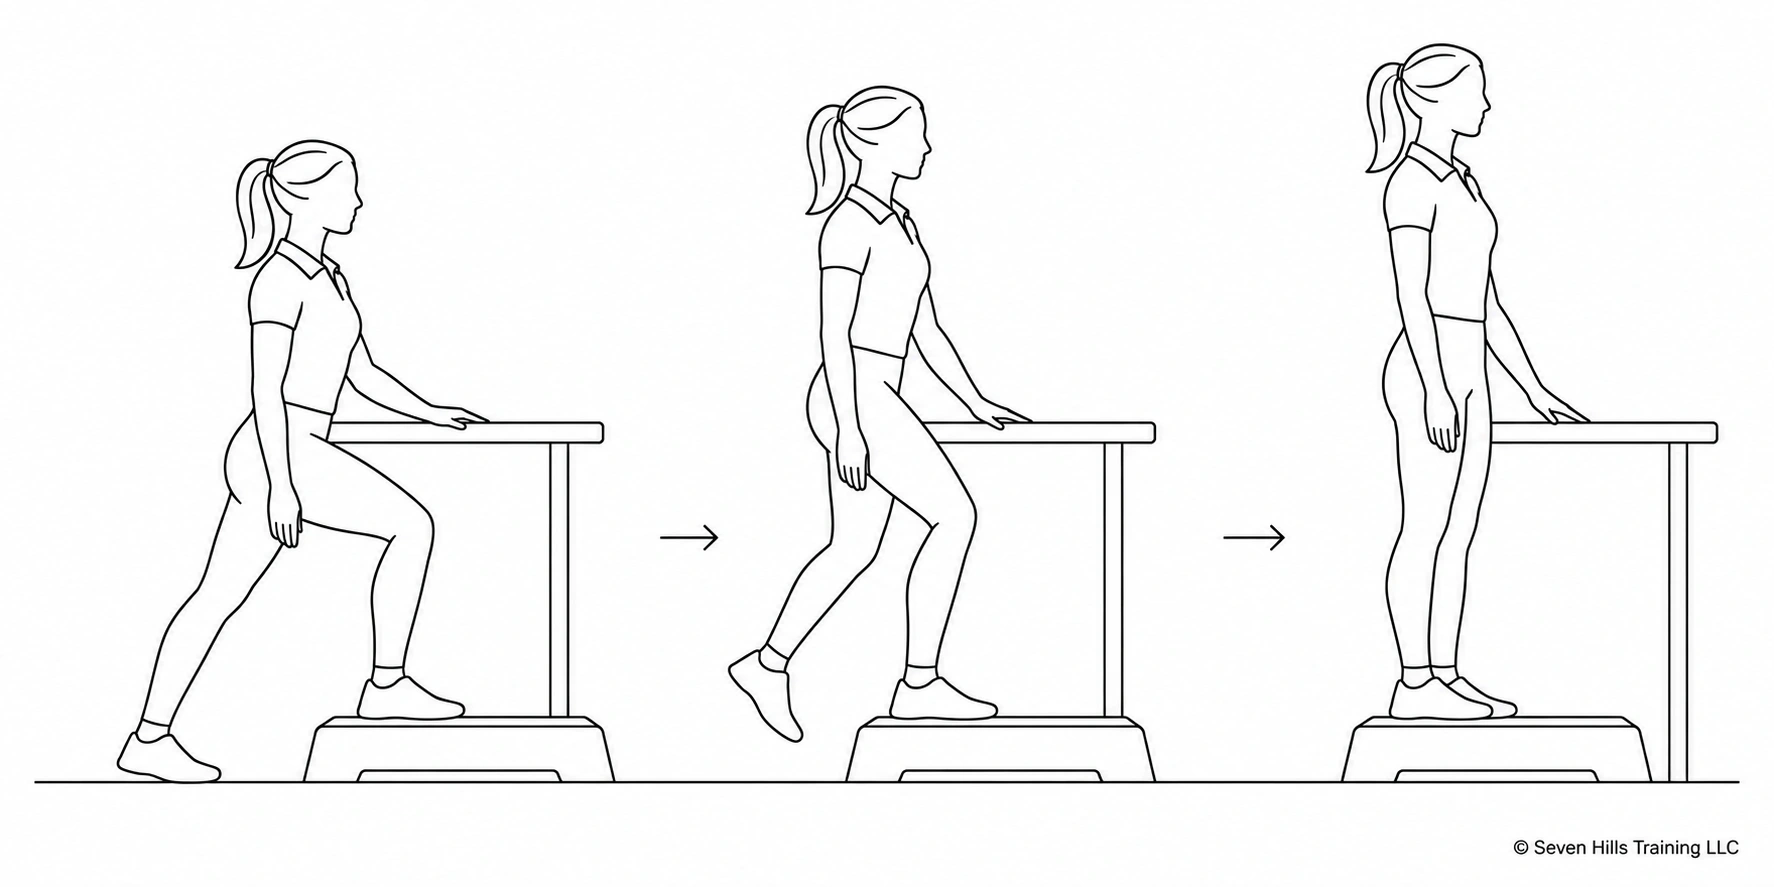
Controlled step-ups
Use a low step with a railing or wall nearby. Step up and down slowly, starting with a few repetitions on each side.
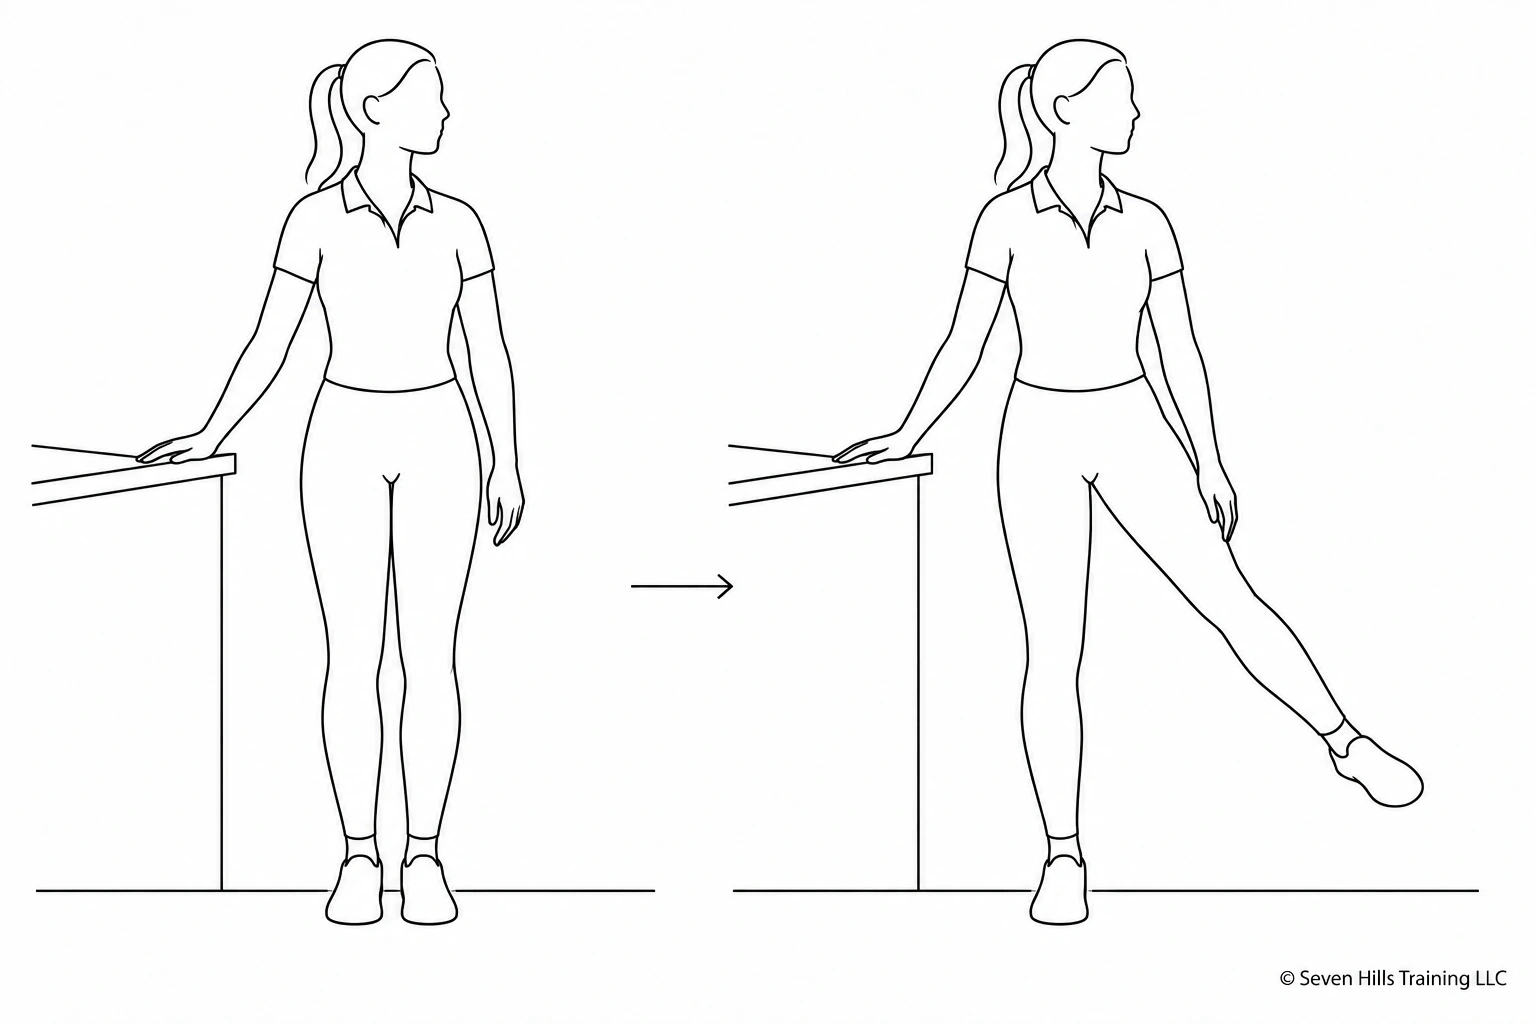
Standing side leg lifts
Hold a stable support and move one leg a short distance sideways, keeping your trunk upright and pelvis level. Lower with control. Begin with five gentle repetitions per side.
- Supported single-leg balance: With fingertips on a counter, balance for five to ten seconds. Repeat up to three times per side, maintaining a soft supporting knee.
- Controlled step-ups: Use a low step with a railing or wall nearby. Step up and down slowly, starting with a few repetitions on each side.
- Standing side leg lifts: Hold a stable support and move one leg a short distance sideways, keeping your trunk upright. Begin with five gentle repetitions per side.
These are established general strength and balance exercises, rather than a validated riding-specific program. [4, 5] Move within a comfortable range and build gradually. Stop exercises that cause pain. A physical therapist can help adapt a routine around injury, persistent restriction, or significant balance difficulties.
In lessons, simple work can provide useful practice too. Large changes of direction, accurately ridden lines, and familiar transitions give you opportunities to notice your position and make small adjustments without adding unnecessary complexity.
Use video to see what you cannot feel
Video gives you a way to compare your experience with an outside view. Record the full horse and rider, including the feet, and keep the camera level. Where practical, include side views and footage traveling toward and away from the camera. Film both reins and a few transitions from your normal work.
A phone or tablet is sufficient. You can use a tripod, ask someone to film, or use a tracking system. Choose clear, representative footage rather than trying to produce a perfect ride.
Review several strides before drawing conclusions. One frame may catch an ordinary movement mid-stride, and an angled camera can create misleading impressions. Video can reveal visible patterns, but it cannot measure saddle pressure or diagnose the cause of an asymmetry.
Biomechanics video evaluation at Seven Hills
Seven Hills Training offers a biomechanics video evaluation that considers the horse’s movement alongside the rider’s position, balance, and timing. The assessment helps identify patterns and compensations and establish priorities for ridden work and targeted exercises.
Based in Monroe, Washington, we work with local riders and those farther away through virtual learning and recorded video review. You do not need a reliable arena internet connection to submit a recording.
Learn about biomechanics evaluation and video review
Paying attention to your own movement gives you another way to support your horse’s training. Start with one recurring pattern, get feedback, and track what changes over time. Small, well-understood adjustments are easier to carry into your everyday riding.
Sources
1. Gunst and colleagues (2019). Influence of Functional Rider and Horse Asymmetries on Saddle Force Distribution During Stance and in Sitting Trot. Journal of Equine Veterinary Science.
2. Uldahl, Christensen, and Clayton (2021). Relationships between the Rider’s Pelvic Mobility and Balance on a Gymnastic Ball with Equestrian Skills and Effects on Horse Welfare. Animals.
3. Hampson and Randle (2015). The influence of an 8-week rider core fitness program on the equine back at sitting trot. International Journal of Performance Analysis in Sport.
4. NHS. Strength exercises.
5. NHS. Balance exercises.
Back to all insights